Install AX Server for Oracle
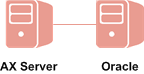
To install AX Server for Oracle, the database server must already be installed on a separate physical machine.
Prerequisites
Before installing AX Server for Oracle, prepare the database server and run the SQL scripts that are included in the installer.
For more information, see Setting up the Oracle database server
Download the installer
Note
The installer download page provides the latest version of ACL GRC Analytics Exchange. If you require an installer for a previous version, you must contact ACL Support Services for a copy of the installer for that version
- Sign in to Launchpad (www.accounts.highbond.com) and click Analytics Exchange.
An email with sign in instructions is sent from notifications@highbond.com to your company's ACL account administrator. If you are unable to sign in to your Launchpad account, contact your company’s ACL account administrator or ACL Support Services for assistance.
- From the Select software package to download list, select the installer you want
to download.
Note
Ensure that you download the correct edition (non-Unicode or Unicode) as all installed applications must use the same edition.
- Click Download <Version> and save the installer to the computer that you plan to install the application on.
Install AX Server
Caution
You must install the KB2919355 Windows Updates before starting your ACL GRC Analytics Exchange installation on Windows Server 2012 R2. If you do not install this update, your ACL GRC Analytics Exchange installation cannot succeed.
Run the installer and select your database configuration
- Double-click the installation package and if a security warning dialog box appears, verify the information listed and click Yes.
- Select the setup language and click OK.
- In the Setup Extraction Location page,
specify the folder where the installation files will be extracted,
and click Install.
Tip
Click Browse to select a folder or accept the default location: C:\Program Files (x86)\ACL Software\Installers\ACLAX<version>_Server_<edition>.
- Click Yes in the dialog box with the message about the database engine.
- In the Analytics Exchange Server Setup Options page, select Oracle and click Install.
- If you are prompted to install prerequisites, click Install and
wait while the prerequisites are installed.
Follow any on-screen instructions to complete the prerequisite setup. You may be required to restart your computer after installing prerequisites.
Configure your ACL GRC Analytics Exchange services
- If you are prompted to install prerequisites, click Install and
wait while the prerequisites are installed.
Follow any on-screen instructions to complete the prerequisite setup. You may be required to restart your computer after installing prerequisites. If you do need to restart the computer, continue the installation by double-clicking the installer then and selecting the appropriate language, installation destination, and database server.
Note
You may be prompted to accept the terms and conditions for the .NET Framework when installing prerequisites. In this case, the terms and conditions dialog box may appear hidden behind the ACL GRC Analytics Exchange installer dialog box. When installing the .NET Framework, ensure that the installer is not waiting for your input.
- In the Welcome page, click Next and in the License Agreement page, select I accept the terms in the license agreement and click Next.
- In the Destination Folders and Settings page,
specify where the AX Server application
files will be installed and the location where AX Server data
will be stored.
If necessary, click Change to modify either, or both, of the default locations. The paths you specify must not include any spaces, and the location you specify for AX Server data must have sufficient disk space available.
Note
If you want to store AX Server data on a dedicated file server or other network location, you need to configure the shared folder after you complete the installation. The shared folder cannot be specified in the AX Server installer.
- In the Analytics Exchange Connector port
number panel, enter the port number for the AX Connector to
use, or accept the default value of 10000.
The AX Connector service is used primarily to access ACL tables on AX Server from ACL Analytics.
- In the Analytics Exchange Tomcat Service
Account panel, do the following:
- Enter the domain and username for the account
in the format domain\username, or click Browse to
locate the required domain and username.
If you browse for the account name, you must enter or select the domain or server name first in the Browse for a User Account dialog box in order for the installer to present the appropriate list of available user accounts.
Note
Using a local user account to run the TomEE service is not supported. These accounts do not have the appropriate privileges to run some ACL commands.
- Enter the Password for the account.
- Click Next.
- If you are prompted to grant the “Log on as a service” right to the Tomcat service account, click Yes and then OK.
For information on the options for configuring service accounts, see Service account configuration.
- Enter the domain and username for the account
in the format domain\username, or click Browse to
locate the required domain and username.
Configure your database connection settings
- In the Configure your ACL Analytics Exchange
database page, ensure that Oracle 11g and
higher is selected, and do one of the following:
Select Create a new database if you are using the AX Server installer to create the ACL GRC Analytics Exchange database schema.
Select Use an existing database if the Oracle database administrator has already created the ACL GRC Analytics Exchange database schema.
- Optional. To encrypt database communications between ACL GRC Analytics Exchange and Oracle, select Encrypt database communications then click Next.
To encrypt the connection, you must configure the Oracle database server for SSL connections.
Tip
Encryption slows performance somewhat, so you should enable it only if data is being transferred between the database server and the application server over an unsecure network.
- If you selected Encrypt database communications,
click Next in the dialog box with the message
about the Oracle SSL port.
Note
The Oracle SSL port must already have been configured correctly by an Oracle database administrator in order to continue with the installation.
- In the Analytics Exchange database connection
settings page, enter the following information to configure the connection string:
Field Description Database Server The IP address or server name of the server where the database server is located.
Service name The Global Database Name of the database instance to use. Non-SSL Port The port to use for standard HTTP connections to the ACL GRC Analytics Exchange database. The default value is 1521. SSL Port The port to use for SSL connections to the ACL GRC Analytics Exchange database. This field is only available if you selected Encrypt database communications. The default value is 2484. Username The name of the user account to use to access the ACL GRC Analytics Exchange database. Password The password for the user account. To verify the connection information, click Test Connection and then click Next.
Important
If you are using SSL, this step may fail when the installer attempts to run the Oracle database scripts, even if the test connection succeeds. If this happens, continue with the installation and then run the provided Oracle database scripts manually to complete the ACL GRC Analytics Exchange installation. For more information about running the scripts, see Running Oracle database scripts.
Configure security and authentication
- In the Microsoft Active Directory Connection
Details page, verify that the value in the Default
Domain text box is correct, or enter the correct value,
and click Next.
Note
The default domain value is the domain end users are authenticated against if they do not specify a domain when they log in using form-based authentication. For example, if an end user enters jsmith as their username, and the default domain is ACL, it is equivalent to entering acl\jsmith.
- In the Analytics Exchange Authentication page,
select the appropriate authentication method:
- Form Based Authentication: Select this option if you want users to be prompted to enter their username and password each time they start a new session with ACL GRC Analytics Exchange. A session is created when a new web browser window is opened, or when AX Client is started.
- Integrated Windows Authentication: Select this option if you want users to be silently authenticated by ACL GRC Analytics Exchange applications based on the user account used to log in to Windows. User accounts that belong to the configured Active Directory domain will not need to enter their username and password information when they access ACL GRC Analytics Exchange applications.
For more information about the authentication options and the required configuration, see ACL GRC Analytics Exchange authentication.
- Specify the AX Server authentication configuration details by doing one of the following and then click Next:
- If you selected Form Based Authentication, specify the hostname of the server where AX Server is installed. For example: AX.ACL.COM.
- If you selected Integrated Windows Authentication,
enter the following information:
- Analytics Exchange Server Hostname: Specify the hostname of the server where AX Server is installed. For example: AX.ACL.COM
- Active Directory Domain – Specify the Active Directory Domain to use to authenticate users
- Kerberos Domain Controller IP Address – The IP address where your organization’s Active Directory Domain Controller is located
- Kerberos Service Password – The password for the Service Principal Name (SPN) account created in Active Directory
- If you have an existing SSL security certificate, do
the following in the SSL certificate information page:
- Select Use existing keystore file and browse to the keystore file on your computer.
- Enter the existing Keystore password.
- In the SSL certificate information page,
enter the following information and then click Next:
Field Description Server name The hostname of the database server. For example: ax.acl.com. Department or division name The division or business unit that the certificate is being issued for. For example: Development. Organization Name The name of your company or organization. For example: ACL Services Ltd.. City Name The city or locality where your company or organization is located. For example: Vancouver. State/Province Name The state or province where your company or organization is located. For example: BC. Country code The two-character country code for the country where your company or organization is located. For example: CA. Keystore password Enter a password of at least 6 characters.
Note
If you are using an existing keystore file, this instance of the Keystore password text box is disabled.
Private key password Enter the same password again. The Keystore password and the Private key password must be identical. For information about how this certificate is used, and for configuration options, see Security certificates.
- In the Enter Tomcat console username and password page,
enter the following information and then click Next:
- Username: Enter the username you want to use to access and administer the Tomcat Web Application Manager and the AX Server Configuration web application
- Password: Enter a password for the username
- Confirm password: Enter the password again to confirm it
Finish the installation
- Click Install.
Note
Before the installation process completes you are required to wait for about a minute while the TomEE application server becomes fully functional. The command window may appear intermittently during this period. Do not cancel the installation.
- When the installation process is complete, click Finish to exit the installer.
The AX Server Configuration web application opens in the default web browser after the installer finishes. You must complete post-installation tasks in the web application in order for AX Server to be fully functional. For more information, see Post-installation tasks.
Note
If the AX Server Configuration web application displays an error in the web browser, wait for 2 -3 minutes before reloading the page. Depending on your server hardware, the required services may take a few minutes to be fully functional.
If you close the AX Server Configuration web application before completing all the post-installation tasks, you can access the web application again in a web browser. The default location is https://<servername>/aclconfig, where <servername> is the hostname or IP address of your AX Server. For example: https://axserver.acl.com/aclconfig.