Upgrade the PostgreSQL database server
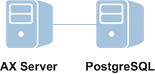
Run the AX Server installer on the database server machine to upgrade PostgreSQL on a separate physical machine. The installer does not upgrade your existing PostgreSQL installation. It installs a new version of the database server and copies the data from your existing installation to the new one.
Before you start
Perform these tasks before you begin the upgrade:
-
Database backup Back up the Analytics Exchange database and the application configuration settings. For more information, see Upgrading AX Server.
-
Check available disk space Check that you have the necessary available disk space on the server where PostgreSQL is installed. Upgrading the PostgreSQL database server requires available disk space equal to three times the size of the current PostgreSQL database.
-
Gather credentials To perform the upgrade you need the following credentials from the original PostgreSQL installation:
-
PostgreSQL service account password
-
PostgreSQL Superuser account password
-
PostgreSQL database user account password
-
SSL certificate password
-
Download the installer
Note
The installer download page provides the latest version of Analytics Exchange. If you require an installer for a previous version, you must contact Support for a copy of the installer for that version.
- Sign in to Launchpad (www.highbond.com).
Your company's System Admin should have already received sign-in information from notifications@highbond.com. If you are unable to sign in to your Launchpad account, contact your company’s System Admin or Support for assistance.
- Under Resources, click Downloads.
- In the top menu, click Analytics Exchange.
- From the Select software package to download list, select the installer you want
to download.
Note
Ensure that you download the correct edition (non-Unicode or Unicode) as all installed applications must use the same edition.
- Click Download Version <version_number> and save the installer to the computer where you will install the application.
Upgrade PostgreSQL
Important
Do not begin the upgrade if you have not backed up the Analytics Exchange database and the application configuration settings. For more information, see Upgrading AX Server.
Start the installer
- Double-click the installation package and if a security warning dialog box appears, verify the information listed and click Yes or Run.
- Select the setup language and click OK.
- In the Setup Extraction Location page,
specify the folder where the installation files will be extracted,
and click Install.
Tip
Click Browse to select a folder or accept the default location: C:\Program Files (x86)\ACL Software\Installers\ACLAX<version>_Server_<edition>.
- If you are prompted to install prerequisites, click Install and
wait while the prerequisites are installed.
Follow any on-screen instructions to complete the prerequisite setup.
Configure the database connection and security
- In the Welcome page, click Next and in the License Agreement page, select I agree to the above terms and the Galvanize Master Subscription Agreement and click Next.
- In the Destination Folder page,
accept the default PostgreSQL install location or click Change to modify the
location, and click Next.
If you modify the installation location, the path you specify must not include any spaces.
Note
Do not select the folder where the previous version of PostgreSQL is installed.
- In the Configure your Analytics Exchange
PostgreSQL database server page select Upgrade.
Note
The existing PostgreSQL installation must be running and you must be able to connect to it in order to proceed with the upgrade.
- Specify
the following information to connect to the existing installation
of PostgreSQL and click Next:
Field Description Database Server The IP address or server name of the server where PostgreSQL is located. Specify the IP address if the PostgreSQL database is on the same server as AX Server. Port number The port number to use to connect to PostgreSQL. Superuser name The name of the PostgreSQL Superuser account. This account was created with the values that were entered when PostgreSQL was initially installed. The default value is postgres. Password The password for the PostgreSQL Superuser account. User name The name of the PostgreSQL database user account that is used to access the Analytics Exchange database. Password The password for the PostgreSQL database user account. Note
If there are any active user connections to the Analytics Exchange database, a dialog box lists the connections. You cannot continue with the PostgreSQL upgrade until all the connections have been closed. All users must log off, you must restart the Analytics Exchange Service, click the Refresh button, and then click Next to continue in the setup wizard.
- If a warning about available disk space appears, click OK.
Important
If you have not confirmed that you have enough available disk space, you should do so now, before continuing.
- In the Service configuration page,
enter the following information to configure the PostgreSQL database
service and then click Next:
Field Description Account name The name of the Windows user account that will run the service. Keep the default account name “postgres” unless you have a reason for changing it. If the account does not already exist, it will be created as a local user account. You cannot use accounts that belong to the Administrators group on the server. If you use an existing account, the required file system permissions and the “Log on as a service” right are assigned to the account.
Account domain The name of the Active Directory domain the user account belongs to.
If you are using a local user account, keep the default value of the computer name.
Account password The password for the user account.
If the user account already exists, you must enter the correct password. If the installer is creating a new account, enter the password you want to use. The password must meet any password complexity requirements that are enforced by the Windows operating system. Additionally, the password must not include backslashes (\) or apostrophes (’).
Verify password Enter the password again to verify it. - If the user account does not exist, click Yes to create the account.
- In the Database configuration page,
enter the following information and then click Next:
Field Description Port number The port number used for communications to and from PostgreSQL. The default port is 5432. Superuser name The name of the PostgreSQL Superuser account. The default value is postgres and it cannot be changed. Password The password for the PostgreSQL Superuser account. Your password must not include backslashes (\) or apostrophes (’).
Note
For security reasons, do not use the same password that you used for the Windows user account that runs the PostgreSQL database service.
Password (again) Enter the password again to confirm it.
Note
Make a note of the PostgreSQL Superuser account name and password. You need to enter them when you create the Analytics Exchange database during the AX Server portion of the installation.
For information about configuring service accounts, see Service account configuration.
- In the SSL certificate information page,
enter the following information to create a self-signed security
certificate to secure HTTPS connections between PostgreSQL and AX Server and then click Next:
Field Description Server host name The hostname of the database server. For example: ax.abc.com. Department or division name The division or business unit that the certificate is being issued for. For example: Development. Organization Name The name of your company or organization. For example: ABC Corporation. City Name The city or locality where your company or organization is located. For example: Vancouver. State/Province Name The state or province where your company or organization is located. For example: BC. Country code The two-character country code for the country where your company or organization is located. For example: CA. Password Enter a password of at least 6 characters. Verify password Enter the same password again. For information about how this certificate is used, and for configuration options, see Security certificates.
- Click Install.
The PostgreSQL database server is installed.
New installation During the subsequent AX Server installation process, a new Analytics Exchange database is created.
Upgrade An existing Analytics Exchange database is copied from an existing installation of PostgreSQL.
- When the installation is complete, click Finish.
When you click Finish, the AX Server installation or upgrade process starts automatically. There may be a delay of approximately a minute before the AX Server process begins.
- Cancel the installer by clicking Cancel as soon as the Cancel button is available.
Post-requirements
Now that PostgreSQL is upgraded, copy the installer to the application server machine and upgrade AX Server. For more information, see Upgrade standalone AX Server for PostgreSQL.