To start manually defining a print image or PDF file you select an initial data value, and then capture an associated set of records.
- Workflow for defining a print image or PDF file – the basic workflow for defining a print image or PDF file prior to importing it into Analytics
- Quick start steps – step-by-step instructions with screen captures
The best way to learn how to define these types of files is to try defining one of the sample files included with Analytics. “REPORT3.TXT” is easier to define. “Inventory.pdf” is more challenging.
Workflow for defining a print image or PDF file
Quick start steps
The procedure below outlines the basic steps for defining a print image or PDF file. For detailed instructions, see Define and import a print image file or Define and import a PDF file.
-
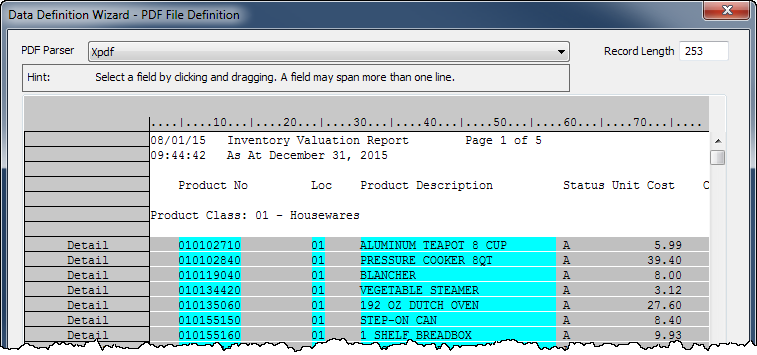
Proceed through the Data Definition Wizard until the source file appears.
For detailed instructions, see Define and import a print image file, or Define and import a PDF file.
-
Select a value in the initial field you want to define.
In the example below, the first value in the “Product No” field is selected.
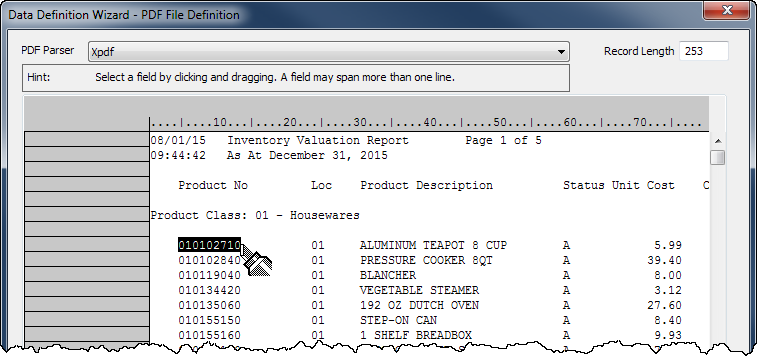
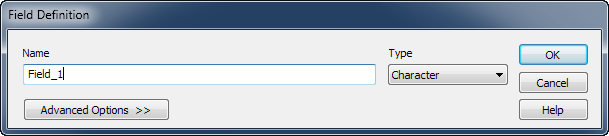
The Field Definition dialog box opens.
-
Type a name for the field, update the data type if required, and click OK.
The value you selected is outlined with a box.
-
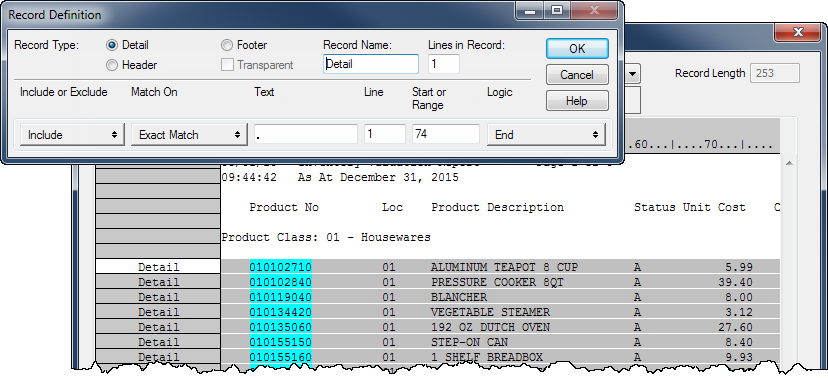
In the value you selected, or in the same row in the file, select one or more characters that are unique to the set of records you want to capture.
For more information, see Defining and importing print image (report) files and PDF files.
In the example below, the decimal point in the “Unit Cost” field is selected.

The Record Definition dialog box opens, and the initial field and the associated set of records are defined.
The field is aqua-blue, and the records are gray. Undefined data continues to have a white background.
-
If required, change the Record Type, or modify or further build the criteria used to capture the set of records, and click OK.
For detailed information, see Working with record definitions.
-
Define additional fields in the record by selecting a value in each field.
Additional fields automatically conform to the set of records.
If field values vary in length, select the longest value, or select extra blank spaces to allow for longer values elsewhere in the field.
In the example below, three fields are defined: “Product No”, “Loc”, and “Product Description”.
-
When you have finished defining the fields you require, click Next.
The remainder of the defining and importing process is similar to the process for defining and importing other data formats such as Excel and delimited text files.
For complete instructions, see Define and import a print image file, or Define and import a PDF file.