Create and edit user groups
User groups are associated with workflows and as Global Administrator you can create, edit and remove user groups. Business area managers can edit user groups associated with their business areas.
Caution
Editing or removing a user group can affect a workflow. Contact Customer Support if you need to confirm what impact changing a user group may have.
Create a new user group
-
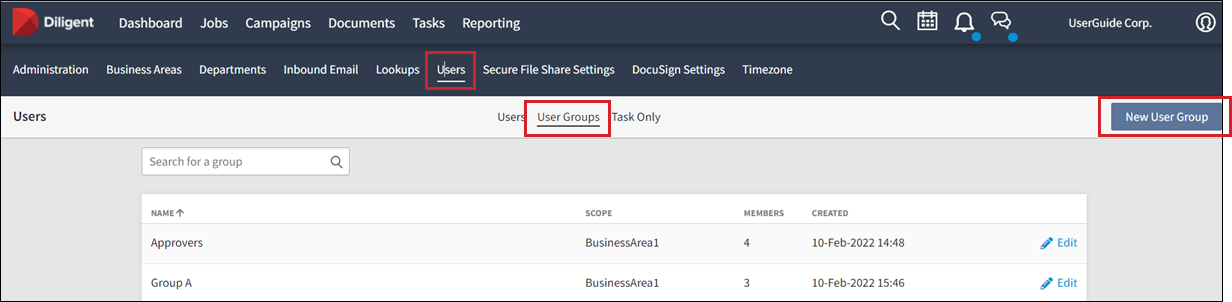
Open your Administration view.
-
Go to the User Groups tab in your User view and select New User Group.
-
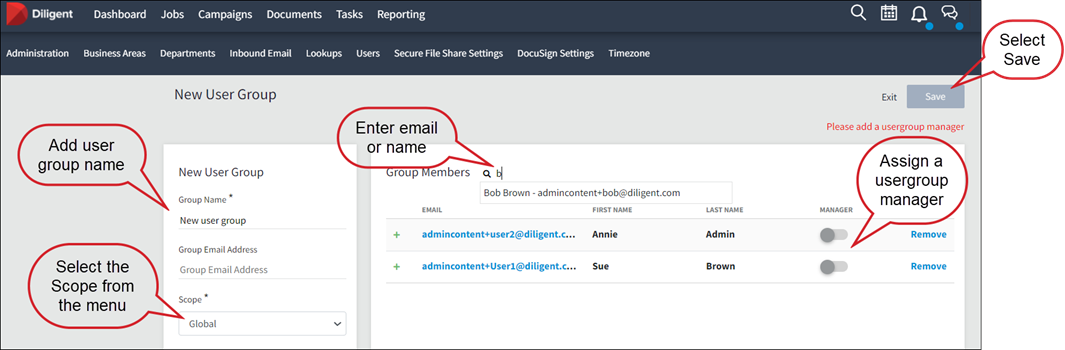
Enter the Group name and select the Scope from the menu.
Note
You can't select group members without selecting the scope.
-
If the scope is for a specified business area, and users must have at least Editor permission to be added to the group.
-
If the scope is Global the user must have at Editor permission at the global level.
-
-
Start to enter a name or email address and a list will be presented. Select them from the list or continue to type.
-
After you have added members to the group you must assign one of them as the user-group manager, by moving the slider next to their name.
Tip
Assign at least two managers to any group to ensure continuity. You can have as many users assigned manager as necessary.
-
Select Save.
Edit an existing group
-
Go to the User Groups tab in your user view.
-
Select the edit icon
 for the group.
You can now edit the group name and the members however, the scope can't be changed.
Reminder
Editing or removing a user group can affect a workflow. Contact Customer Support if you need to confirm what impact changing a user group will have.