Creating your first project
Projects is an app in Diligent One.
You can use follow this quick start if you are using the Projects app for the first time. This quick start illustrates how to define objectives, risks, and procedures within a project, execute procedures, and report on issues.
Before you start
An administrator must do the following:
- Add you to Diligent One Platform
- Assign you a role and / or privilege in Projects that allows you to create a project
Note
- Interface terms are customizable, and fields and tabs are configurable. In your Diligent One organization, some terms, fields, and tabs may be different.
- If a required field is left blank, you will see a warning message: This field is required. Some custom fields may have default values.
Workflow
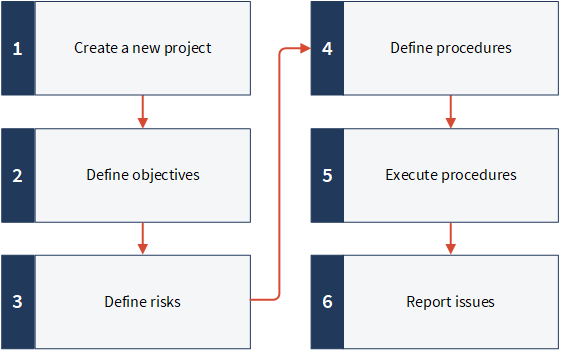
1. Create a new project
-
From the Platform home home page (www.diligentoneplatform.com), select the Projects app to open it.
If you are already in Diligent One, you can use the left-hand navigation menu to switch to the Projects app.
Note
Diligent One Platform also supports the domain www.highbond.com. For more information, see Supported domains.
- Click New and select New Blank Project.
- Enter the details of the project.
- Select the Other Project/Audit project type and click Save.
Result The project is created. The labels and terminology used in Projects are dependent upon the project type that you select.
2. Define objectives
- Click the Fieldwork tab.
- Click Add Objective to create an objective for the project.Tip
Objectives help you organize the project and assign work out to the relevant owners.
- Enter the details of the objective and click Save.
- Repeat step 3 to add additional objectives.
Result The objectives are added to the project.
3. Define risks
- Click the Fieldwork tab.
- Click Go To beside the appropriate objective, and select Project Plan.
- Click Add Risk.
- Enter the details of the risk and click Save.
- Repeat step 4 to add additional risks to the same objective.
Result The risks are added within the objective.
4. Define procedures
- Enter the details of the procedure and click Save.
- Repeat step 3 to add additional procedures to the same objective.
Result The procedures are added within the objective.
5. Execute procedures
- Click Execute Procedures.
- Click View/Edit beside the appropriate procedure.
- Enter the details in the Execute Procedures page and click Save.
- Optional. Do any of the following:
- Create a request Click Add in the Requests side panel.
- Identify an issue Click Add Issuein the Issues side panel.
- Include supporting files Attach a file using the Drag & Drop uploader.
- To execute other procedures, click the side arrow
 next to Execute Procedures, select a procedure, and repeat steps 3-4.
Result You have executed procedures.
6. Report issues
Export a report or create a custom report:
- Export a report Within the project, click the Issues tab and choose a report to download (.xlsx or .pdf).
- Create a custom report From the Projects home page, under Planning and results, click Issue Tracker and use the Issue Report Builder to build a report.
Result You have exported or created a report.