Navigating Integrations
Get familiar with the components of Integrations.
How do I access Integrations?
-
From the Platform home page (www.diligentoneplatform.com), select Marketplace to open it.
If you are already in Diligent One, you can use the left-hand navigation menu to switch to Marketplace.
Note
Diligent One Platform also supports the domain www.highbond.com. For more information, see Supported domains.
-
Select Integrations.
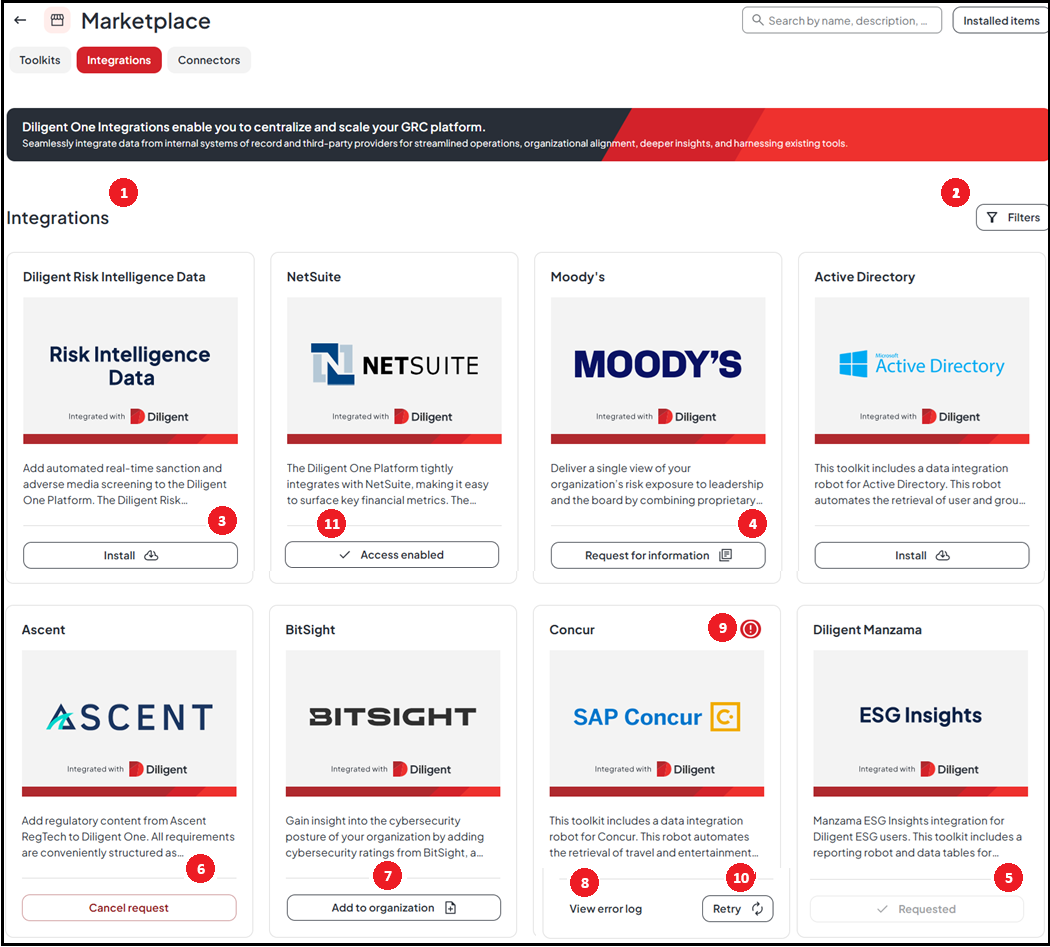
Integrations page
The following image depicts the options available on Integrations. For more information on the permissions, refer to Getting started.
|
Number |
Option | Description |
|---|---|---|
| 1 |
Integrations catalog |
The Integrations catalog provides a comprehensive list of curated integrations for categories such as Analytics, IT Risk and Compliance, Risk Management, and Regulatory Compliance. Each integration tile provides a summary of the integration and the option to install, request for information, and more based on your permissions. You can also view the details of an integration by selecting its tile. |
| 2 | Filters |
Utilize the Filters option on the side panel to narrow down your choices by category. It helps you access relevant information faster, improving overall efficiency in interacting with the system. |
| 3 | Install |
|
| 4 | Request for information |
|
| 5 | Requested |
|
| 6 | Cancel request | As a System Admin, you can cancel a request for information using this option. You must also provide a reason for cancellation from the dropdown menu. |
| 7 | Add to organization |
The integrations with the label Add to organization are the entitled ones. Standard Users can request their System Admins to install these integrations within their organizations. |
| 8 | View error log |
|
| 9 | Error |
If an integration fails to install, the error icon appears at the upper right corner of the tile where applicable. As a System Admin, you can select this icon and view the details of the integration, the error log, and send an email to the Support Team. |
| 10 | Retry |
|
| 11 | Access enabled | The integrations with the label Access enabled are the entitled ones. As a System Admin, you can install these integrations within your organization. |