Creating and editing metrics
Create, edit, or delete metrics from the metrics page. Metrics are based on filtered table data, and you work with new or existing metrics from the same page.
Create a metric
Open the metrics page, filter the data in the table, and then configure a new metric based on the filtered data.
Navigate to the new metric
- Open the Results app.
- Open the collection that contains the table you want to work with.
- For the table you want to create a metric on, click the number in the Metrics column.
- Click New.
Tip
To save time, you can create a new metric by copying an existing one and then editing it. To copy a metric, on the Metric toolbar, click Save > Save As, and enter a new name. For help editing the new metric, see Edit an existing metric.
Filter the table data
Note
Filters apply to the currently selected metric only. When you apply the filter, only the metric actively selected in the Manage Key Indicators panel is affected.
- Open the Results app.
- Navigate to the appropriate table.
- To open the filter dialog box, on the right-hand side of the screen, click Filters
 , click + Add Filter, and then select the column to filter.
You can enter a keyword or phrase into the Search field to filter the list of available columns.
Tip
You can also access the filter dialog box by clicking the heading of the column you want to filter.
- In the Filter section, do one of the following:
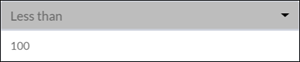
- From the Select Condition list, select a conditional operator to use and then enter the value to test against.
- To include only those records with values equal to a specific value or set of values, select one or more values below the Filter section.
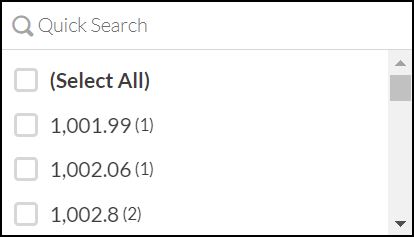
The list displays the first 200 values in sorted order and shows their frequencies in parenthesis. To restrict the list, or to view values beyond the first 200, enter a term in the Quick Search field. The search is progressive and case-insensitive.
Tip
Use the Select All option to select or clear all the values in one click.
- From the Select Condition list, select a conditional operator to use and then enter the value to test against.
- Click Add Filter to add the filter to the panel.
- After finalizing the selection, click Apply Filters.
- Optional To add another filter, click + Add Filter and repeat the steps above.
- Optional To change a filter that you have defined, do any of the following:
- To modify a filter, make your changes and click Apply Filters.
- To temporarily disable a filter, click the toggle
 .
. - To delete a filter, click
 .
.
- To save your changes, click Save and then Save again.
Configure the metric
- To open the Configure Metric panel, in the upper-right corner, click Configure
 .
. - In the Configure Metric panel, from the Measure Field list, select the column that the metric is based on.
To format the display of the metric value, click Format Options and specify any of the following:
- numeric format
- rounding rule
- conditional formatting
- Complete the following fields and then at the upper right of the page, click Save:
Field Description Date/Datetime Range Defines the temporal range of the metric calculation. By default, the field is set to Published, however you can specify an alternative date or datetime field. Period Summarizes the metric into one of the following periods:
- daily
- monthly
- quarterly
- yearly
Function Defines the aggregate function to use in the metric calculation. Different functions are available for each data type, and you can select:
- an absolute measure such as Average or Blank
Tip
The result of the absolute calculation is previewed next to the function name.
- the % of Total function to measure the percentage of records that satisfy a condition that you define by selecting an operator and then entering a value to test against:
Name Sets the name of the metric. By default, the metric is named functionName of measureFieldName, however you can rename the metric using a custom name of your choosing. Type Tags the metric as one of the following indicator types:
- Key Performance Indicator
- Key Risk Indicator
- Key Control Indicator
- Other metric
Base Color Sets the color of the metric when the calculation does not exceed the threshold.
Set a trigger on the metric
Once you configure a metric, set one or more triggers to monitor the metric's performance and notify key stakeholders.
For more information, see Triggering actions from metrics.
Edit an existing metric
Open the metrics page, select an existing metric, and change the configuration.
- Open the Results app.
- Open the collection that contains the table you want to work with.
- For the table you want to edit metrics from, click the number in the Metrics column.
- From the list of metrics, select the metric you want to view.
- In the Configure Metric panel, edit the metric configuration and then on the Metrics toolbar, click Save. For more information about editing the metric, see Configure the metric.
- When you are done editing, do one of the following:
- To save your changes and overwrite the existing metrics configuration, click Save > Save.
- To save your changes as a new metric:
- Click Save > Save As.
- Enter a name for the metric and click Save.
Rename a metric
Open the metrics page, select an existing metric, and change the name.
- Open the Results app.
- Open the collection that contains the table you want to work with.
- For the table you want to edit metrics from, click the number in the Metrics column.
- From the list of metrics, select the metric you want to rename.
- On the Metrics toolbar, click More Actions
 and select Rename. Enter a new name for the metric and click Save.
Delete a metric
Open the metrics page, select an existing metric, and then delete it.
- Open the Results app.
- Open the collection that contains the table you want to work with.
- For the table you want to delete metrics from, click the number in the Metrics column.
- From the list of metrics, select the metric you want to delete.
- On the Metrics toolbar, click More Action and select Delete.