Add a new data room user
There are three (3) types of non-administrative users: Licensed personal data room users / members, licensed team users / members, and external collaboration users / members.
As organizational administrator you add new licensed personal data room users to your Secure File Sharing organization. These users get a Personal Data room with a designated amount of storage space where they can upload and manage their files. You need to be in the Administration mode - accessible from your profile icon - to undertake this task.
After you have completed the process outlined below they are sent an invitation email to register in your organization. Each user who accepts an invitation and registers for a data room will utilize a license.
Note
New Team room members are added by the Data room manager. For further information go to Add new Team Data room members
-
In the Users tab select Add user from the toolbar.
-
In the Add user dialog enter the user's email address and select the Enter key on your device. You can add more than one user at a time.
-
The Language will default to your browser. You can choose one of five alternative from the drop down menu.
-
Select User as the Role assignment.
-
User tag is the default role for all Personal Data Rooms.
-
Admin tag is the Organizational Administrator role, used to provide the user with admin capabilities.
Note
Do not select Auditor, BoardOfficer, Submitter, or BoardMember as they are not used in Secure File Sharing. You can remove any tag by selecting the X next to the role tag.
-
-
Enter a personal message and select Include signature. These are optional.
-
Select OK.
Tip
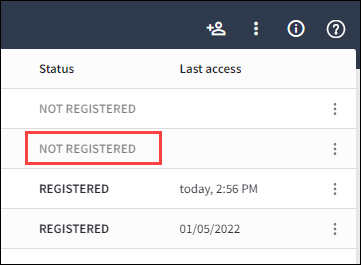
The recipient will be sent an invitation email to join the organization. They will show as Not Registered in the Status column in your Users view until they follow the Accept Invitation link in their email and register for a data room.

A user who is Not Registered can be re-invited should they lose or not receive the invitation email or have the invitation withdrawn.
Re-invite a user should they lose or not receive an invitation email
-
Select the more options icon
 for the user.
 -
Select Re-invite.
An invitation email will be sent to the recipient.
Withdraw an invitation
-
Select the more options icon
 for the user.
 -
Select Withdraw invitation.
The recipient will no longer be able to access the link previously sent to them.