Analytics and Robots
Robots is a HighBond app that you use to automate repetitive tasks using scripts built in Analytics. Once you create the scripts, you upload them to Robots, where you configure the task automation that you need. Robots handles the recurring tasks according to your configuration.
For detailed information about the Robots app, see Robots Help.
How do I automate using Robots?
To automate repetitive tasks using Robots, you must first create a project in Analytics that contains at least one analytic script. An analytic script is an Analytics script that uses an analytic header to declare certain properties and instructions for running the script.
For more information about analytic scripts and analytic headers, see Analytic scripts.
Committing scripts and creating a robot
Once you have written the analytic script or scripts, you upload them to Robots. The action of uploading scripts from Analytics to Robots is called committing scripts. Committing scripts for the first time causes a robot to be created in the Robots app. A robot is a container that houses committed analytic scripts, any helper scripts, and related files. The robot is the object that you configure to carry out scheduled, automated tasks.
Development mode versus production
Scripts are committed to Development mode only in Robots, never to production. This design protects the production scripts, which are kept completely separate from Development mode.
Once you have committed the final version of a script or scripts to Development mode, you must explicitly activate the version into production.
An alternate approach
In Robots, you can create an empty robot and then commit scripts from Analytics to the empty robot. Whether you manually create the robot in Robots, or automatically create the robot when you commit scripts for the first time, the result is the same.
An iterative workflow
You can edit one or more scripts and re-commit them to Robots. Each time you re-commit scripts, you create a new version of the scripts. You can use either of these methods for editing and re-committing scripts:
- Edit an existing script or scripts in a project associated with a robot and commit the scripts again.
- Download scripts from a robot to Analytics, edit one or more of the scripts, and commit the scripts.
How script versions work
| Versions are sequentially numbered |
Each time you commit one or more scripts to the same robot you create a new, sequentially numbered version of the scripts: version 1, version 2, and so on. By saving successive versions of scripts, Robots ensures that you do not lose any of your scripting work, and allows you to easily access older versions, if necessary. |
|---|---|
| Versions are self-contained |
Each committed version is completely self-contained. Earlier versions of scripts are never overwritten, and scripts are never merged across versions. If you remove a script from a project, all subsequent versions that you commit do not contain the script. |
| Versions contain all scripts | A version contains all the scripts that are in a project when you commit the scripts to Robots. You cannot selectively commit scripts from a project. |
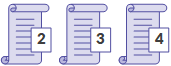
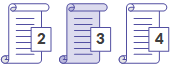
Example of script versions
Scenario
You want to automate a set of analytical tests that your department currently performs manually on the bi-weekly payroll file. The tests check that employees are paid correctly, proper payroll deductions are made, no phantom employees are paid, and so on.
The script development workflow
- In Analytics, you develop a script that imports the payroll file, performs some preliminary data preparation tasks, and then performs all the analytical tests.
- You commit the script to Robots, where you run it in Development mode against a copy of the actual data to ensure that it is working correctly.
- Once the script is working correctly, you are going to schedule it to run automatically in production every two weeks.
| Analytics | Action/Result | Robots |
|---|---|---|

Commit Scripts >> |
|
>> Version One |
Commit Scripts >> |
|
>> Version Two |
Commit Scripts >> |
|
>> Version Three |
|
|
||
 edited script
  unchanged script
Best practices when editing and committing scripts
Treat the scripts on Robots as the master versions
Scripts are protected from alteration once they are committed to Robots. As a best practice, you should treat the scripts on Robots as the master versions. If you want to edit scripts, you should first download the scripts from Robots rather than using locally saved copies. Download the version of the scripts that you want to work with.
The risk of beginning work with a local copy
The risk of beginning your editing work with a local copy of scripts is that the copy may not match the version on Robots:
- you may have inadvertently altered the local copy, or forgotten that you altered it
- someone else may have committed a version of the scripts to Robots, subsequent to your last commit of the scripts
When is it safe to skip downloading?
After downloading a script version, it is generally safe during a single scriptwriting session to commit iterative versions of the scripts directly from the Analytics project, without downloading between iterations.
If someone else could be working on the scripts at the same time as you, then download between iterations. It is recommended that only one person at a time work on a script version.
Test edited scripts that are part of scheduled tasks
You should always test an edited script or scripts that are part of a schedule task in Robots to make sure that the edits have not broken the task.
For example, making any of the following edits to an analytic header in a script can break the associated task, and the task must be recreated:
- adding or removing an input parameter
- adding or removing an input file, table, or field
- changing a hard-coded input file, table, or field name
Syntax validation
Every time you commit scripts to Robots, Analytics automatically performs two types of syntax validation or checking. If any script does not pass the validation or checking, committing the scripts is prevented, and a message appears that identifies the location of the problem.
- Analytic header validation The analytic header in an analytic script must conform to certain requirements. If it does not conform, the analytic script fails when run.
Analytic header validation cannot be disabled.
For more information, see Adding analytic headers.
- Script syntax checking Certain elements in analytic scripts, such as run-time user interaction commands and absolute file paths, are not supported, or not recommended.
Script syntax checking is enabled by default. If you want to turn it off, select Disable Script Syntax Check Before Commit Scripts in the Options dialog box (Tools > Options > Interface).
For more information, see Analytic development best practices.
Committing scripts to Robots
Several possibilities exist when you commit scripts to Robots.
The easiest way to understand the various possibilities is to think of an Analytics project and a robot as two containers, holding scripts, that can be associated. Once they are associated, you can commit successive versions of scripts from the project to the robot.
Note
When you commit scripts to Robots, all scripts in the Analytics project are committed and together become "a version" in the associated robot. You cannot selectively commit scripts from a project.
To commit scripts to Robots, you must be assigned to the appropriate role in the Robots app. For more information, see Robots Help.
| Action | Result upon commit |
|---|---|
| Commit scripts to a new robot |
A new robot is created that contains version 1 of the committed scripts. |
| Commit scripts to an existing robot |
The existing robot contains the committed scripts, with a version number that depends on whether the robot already contains scripts. |
| Commit edited scripts |
A new version of the scripts is committed to the robot associated with the project. |
| Commit scripts to a different robot |
The scripts are committed to either a newly created robot, or an existing robot. The association between the project and the previous robot is deleted. |
Commit scripts to a new robot
Commit scripts to Robots for the first time to create a new robot that contains the committed scripts.
- From the Analytics main menu, select File > Commit Scripts.
If an error message appears, there may be a problem with the analytic header, or the script syntax, in one or more of the scripts in the project.
For more information, see Syntax validation.
- If required, in the Select Destination dialog box, double-click the appropriate organization.
The Robot Collection appears with the list of existing robots.
- Type a robot name in the New Robot field, and click Create.
The robot is created, and a robot ID is automatically generated.
The Analytics project that contains the scripts, and the new robot, are now associated so that subsequent commits do not require that you manually locate the robot.
Note
Do not use the following characters anywhere in the robot name: "$", "€".
- Enter a short commit message that describes the committed scripts, and click OK.
Version 1 of the scripts is committed to the newly created robot. The scripts exist in Development mode only at this point.
- Optional. In the Commit Scripts Successful dialog box, click either of the links to inspect the newly created robot or the committed scripts.
- Click OK to exit the dialog box.
Commit scripts to an existing robot
Commit scripts to a robot that already exists to populate the robot. The existing robot can already contain scripts, or it can be empty.
Note
Use this method if the project is not yet associated with a robot. If the project is already associated with a robot, see Commit scripts to a different robot.
- From the Analytics main menu, select File > Commit Scripts.
If an error message appears, there may be a problem with the analytic header, or the script syntax, in one or more of the scripts in the project.
For more information, see Syntax validation.
- If required, in the Select Destination dialog box, double-click the appropriate organization.
The Robot Collection appears with the list of existing robots.
- In the list of robots, select the robot that you want to commit the scripts to and click OK.
The Analytics project that contains the scripts, and the existing robot, are now associated so that subsequent commits do not require that you manually locate the robot.
-
Enter a short commit message that describes the committed scripts, and click OK.
The scripts are committed to the existing robot. The version number of the scripts depends on whether the robot already contains scripts, or whether it was previously empty.
The scripts exist in Development mode only at this point.
- Optional. In the Commit Scripts Successful dialog box, click either of the links to inspect the existing robot or the committed scripts.
- Click OK to exit the dialog box.
Commit edited scripts
Commit edited scripts to create a new version of the scripts in the associated robot.
Two methods exist for editing scripts before committing them. You can edit the scripts in the associated project, or you can download the scripts from Robots to a new Analytics project, and edit the scripts in the new project.
Note
Downloading the scripts from Robots before beginning any editing work is a best practice. You can be sure that the downloaded scripts have not been altered, unlike scripts that are stored locally.
During a single scriptwriting session, if you are the only person working on the scripts, it is generally safe to commit iterative versions of the scripts directly from the project, without downloading between iterations.
Download the scripts from Robots
Perform this portion of the procedure if you want to work with scripts contained in Robots, rather than scripts already on your local computer.
- In Robots, navigate to the robot containing scripts that you want to edit.
- Click the Dev mode toggle, and select Script Versions.
- Select the version of the scripts that you want to edit and in the Version details panel select Download scripts.
The version of the scripts that you selected is downloaded to the default Downloads folder on your computer. The scripts are contained in a newly created Analytics project with the same name as the robot you downloaded from. The project and the robot are automatically associated.
Note
The robot is now associated with two projects: the project that was just created by downloading, and the project previously used to commit the scripts. One robot can be associated with multiple projects.
- Optional. Move the project containing the downloaded scripts if you want to work with it in another folder.
Edit the scripts in Analytics and commit them
- In Analytics, edit the scripts and save your changes.
Note
You can also add or delete scripts, if required.
- From the Analytics main menu, select File > Commit Scripts.
If an error message appears, there may be a problem with the analytic header, or the script syntax, in one or more of the scripts in the project.
For more information, see Syntax validation.
- Enter a short commit message that describes the change to the committed scripts, and click OK.
The scripts are committed to the associated robot where they are saved as a new version. Existing versions of the scripts in the robot are not overwritten.
If an error message appears stating that the associated robot is not found, check that the robot exists in Robots, and that your role allows committing scripts.
- Optional. In the Commit Scripts Successful dialog box, click either of the links to inspect the robot, or the new version of the scripts.
- Click OK to exit the dialog box.
Commit scripts to a different robot
Commit scripts to a different robot to add a version of the scripts to the robot, and to change the robot associated with the project. The scripts can be either edited or unedited.
Two possibilities exist when you commit scripts to a different robot:
- commit scripts to a new robot
- commit scripts to an existing robot
- From the Analytics main menu, select File > Commit Scripts As.
If an error message appears, there may be a problem with the analytic header, or the script syntax, in one or more of the scripts in the project.
For more information, see Syntax validation.
- If required, in the Select Destination dialog box, navigate to the appropriate organization.
The Robot Collection appears with the list of existing robots.
- Do one of the following:
- Commit scripts to a new robot Type a robot name in the New Robot field, and click Create.
The robot is created, and a robot ID is automatically generated. The Analytics project that contains the scripts, and the new robot, are now associated.
Note
Do not use the following characters anywhere in the robot name: "$", "€".
- Commit scripts to an existing robot In the list of robots, select the robot that you want to commit the scripts to and click OK.
The Analytics project that contains the scripts, and the existing robot, are now associated.
The association between the project and the previous robot is deleted.
- Commit scripts to a new robot Type a robot name in the New Robot field, and click Create.
- Enter a short commit message that describes the committed scripts, and click OK.
The scripts are committed to the newly created or the existing robot. The version number of the scripts depends on whether the robot already contains scripts, or whether it was previously empty.
The scripts exist in Development mode only at this point.
- Optional. In the Commit Scripts Successful dialog box, click either of the links to inspect the newly created or the existing robot, or the committed scripts.
- Click OK to exit the dialog box.
Viewing Robots tables, logs, and files
You can download Analytics tables or logs, or non-Analytics files, from Robots and view them on your local computer. Different options exist depending on the table or file type.
| Table or file type | Download in result package or Analytics project | Download individually | View in Robots |
|---|---|---|---|
| Analytics result table |
|
|
|
| Analytics data table |
|
|
|
| Analytics result log |
|
|
|
| non-Analytics result file |
|
|
|
| non-Analytics related file |
|
|
|
Viewing a table in Analytics
The contents of a downloaded result package, or Analytics project, and how you view downloaded Analytics tables, depends on the type of Robots Agent you are using.
For more information about the Robots Agent, see Robots Help.
| Agent type | Download and view details |
|---|---|
| On-premise Robots Agent |
|
| Cloud-based Robots Agent |
|
Download task results
Task results can include Analytics result tables, other file types, and a log file.
Task results are specified using the //RESULT analytic tag. For more information, see RESULT.
- From the Robots dashboard, click the robot that contains the results.
- In the top right-hand corner of the robot, use the Dev mode toggle to select the environment to use.
- Select the Task runs tab.
- Select the task run with the results that you want to download.
- In the Task run details panel, do one of the following:
Download a result file individually Click Download beside the name of a non-Analytics result file, or an Analytics log file.
Result The file is downloaded to your local file system and can be opened in its native application. An Analytics log file can be opened in any text editor. You can also click View beside the name of a log file to view the log directly.
Download all result files in a package Click Download result package.
Result A compressed file named <robot_name>.zip, which includes an Analytics project, is downloaded to your local file system.
You can extract the contents of the compressed file, open the Analytics project in Analytics, and view the Analytics result tables. You can open any other result file types, such as Excel, in their native applications.
If the task run failed, click Download failed package to download the log file. You can also click View beside the name of the log file to view the log directly. The log file can help you identify the reason the task failed.
Download an Analytics data table
Note
Analytics data tables are not supported by the cloud-based Robots Agent.
Data tables are specified using the //DATA analytic tag. For more information, see DATA.
- From the Robots dashboard, click the robot that contains the data table or tables.
- In the top right-hand corner of the robot, use the Dev mode toggle to select the environment to use.
- Select the Input/Output tab.
- In the Other tables list or the Source tables list, select the data table that you want to download.
- In the Table details panel, click View Table in AN.
Tip
If you want to remove the table, click Delete table > Delete.
Result An Analytics project named <robot_name>.acl is downloaded to your local file system. The project contains all the data tables from the Input/Output tab, not just the table you selected.
You can open the project in Analytics and view the data table.
Open a downloaded Analytics table (on-premise Robots Agent)
Before you start
To connect to data on a Robots Agent you must have a Server Profile configured in Analytics.
Open the table
Note
To open a Robots table in Analytics, the Enable Server integration option must be selected (Tools > Options > Interface).
To connect to the Robots Agent, the edition of Analytics (Unicode or non-Unicode) must match the edition of the agent.
- Navigate to the downloaded or unzipped Analytics project (*.acl) and double-click it.
The project opens in Analytics.
- Double-click a Robots table to open it.
- Enter your network password and click OK.
Tip
If you cannot connect to the Robots Agent, delete the RobotsProfile and close and reopen the Analytics project to automatically create a refreshed profile. To delete the RobotsProfile, on the Analytics main menu, go to Server > Server Profiles.
Open a downloaded Analytics table (cloud-based Robots Agent)
- Navigate to the unzipped Analytics project (*.acl) and double-click it.
The project opens in Analytics.
- Double-click a table to open it.