Creating your first report
Reports is an app in Diligent One. This quick start illustrates how to create a report in the Reports app, using a report template as a starting point.
Before you start
Reports setup
An administrator must do the following:
- Assign you the Report Admin or Report Writer role
- Create content folders and sub folders to store reports
Projects setup
You need to add issues using Projects.
Workflow

1. Copy a report template
-
From the Platform home page (www.highbond.com), select the Reports app to open it.
If you are already in Diligent One, you can use the left-hand navigation menu to switch to the Reports app.
- From the Browse page, under By Folder, open the Diligent One Templates folder and open the Report Templates sub folder.
- Right-click the Issues by Owner and Severity Bar Chart, and select Make a copy.
Result The report opens.
2. Customize the report
- Next to Columns, hover your mouse over the following fields, select
 , and select Delete:
- Issue Owner
- Number of Issues
- Issue Severity
- Expand the Issues folder.
- Drag in the Issue Title field into the Columns field.
- Click the down arrow next to Issue Title, and select Aggregation > Count.
Result You have defined the fields in the report.

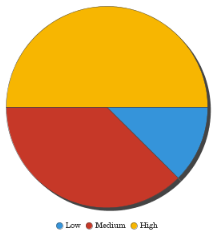
3. Visualize the data with a chart
- Click Charts in the navigation menu.
- Click Auto Chart > Select Chart Type.
- Select the Pie chart.
- Drag Severity into the Color field and drag Count Issue Title into the Size field.
Result You have visualized the data as a pie chart.
4. Save the report
- Click Publish.
- Call the report Issues by Severity, and provide a new description, if desired.
- Specify the appropriate content folder and sub folder to define where the report will be saved.

- Under Report Access, select Public.
All users that have access to the content sub folder the report is stored in will be able to view the report.
- Click the Distribution and Report Settings tabs to define how the report can be distributed, and if the report can be displayed in certain areas in Reports.
- Click Save > Activate.
Result The report is now available to users with the appropriate access.
What to do next
- Email the report to share data with others: Emailing reports
- Set up a schedule for the report to be delivered to specific individuals on a recurring basis: Broadcasting reports via email
- Add the report to a dashboard along with other reports and charts to present information to stakeholders: Showing reports on dashboards