Administration > Installing AX Client

Installing AX Client

Install AX Client by downloading the installer from ACL Launchpad, obtaining your AX Server hostname, and running the setup wizard.

Note

You must have Administrator rights for the computer to complete the installation.

Installation overview

  1. Check the minimum requirements: ensure your computer meets the hardware and software requirements for AX Client. For details, see AX Client requirements
  2. Download the installer: download the AX Client installer from ACL Launchpad. For steps, see Download the Analytics Exchange installer
  3. Get your AX Server hostname: ask your Analytics Exchange administrator for the hostname.

    Note

    You can successfully install the program without the server hostname, but you require the hostname to connect to the server.

  4. Run the AX Client setup wizard: For steps, see Run the AX Client setup wizard
  5. Connect to AX Server: connect your AX Client installation to your organization's audit data. For steps, see Connect to AX Server

Tip

If you need to deploy AX Client to a large number of applications, use the silent installation option instead. For more information, see Running AX Client silent installation.

Download the Analytics Exchange installer

Note

The installer download page provides the latest version of Analytics Exchange. If you require an installer for a previous version, you must contact ACL Support Services for a copy of the installer for that version

  1. Sign in to ACL Launchpad (www.accounts.highbond.com) and click Analytics Exchange.
  2. From the Software package to download list, select the installer you want to download.

    Note

    Ensure that you download the correct edition (non-Unicode or Unicode) as all installed applications must use the same edition.

  3. Click Download <Version> and save the installer to the computer that you plan to install the application on.

Run the AX Client setup wizard

  1. Close all other Windows applications and run the installer ACLAX<version>_Client_<edition>.exe.

    The <edition> indicates whether you are installing the non-Unicode or Unicode edition of AX Client. The Analytics Exchange applications you download and install must be the correct edition for your organization, and all installed applications must use the same edition.

    Note

    Depending on your system configuration, you may be prompted to confirm that you want to allow the installation to make changes on your computer. You may also be prompted to enter an administrative user password before proceeding with the installation.

  2. Choose the setup language and click OK.
  3. In the Setup Extraction Location page, select the Destination Folder and click Install.

    The default extraction folder in the Windows Program Files folder or Program Files (x86) folder on 64-bit computers is: ACL Software\Installers\ACLAX<version>_Client_<edition>

    The setup files are extracted to the destination folder you specified. After the files are extracted the setup wizard starts automatically. If the setup wizard fails to start automatically for any reason, you can use Windows Explorer to navigate to the folder where the setup files were extracted and double-click setup.exe.

  4. In the Welcome page, click Next.
  5. In the License Agreement page, select I accept the terms in the license agreement and click Next.
  6. In the Destination Folder and Settings page, do the following:
    1. If the default Destination Folder where AX Client will be installed needs to be modified, click Change and select the appropriate folder. The default destination folder is C:\Program Files\ACL Software\ACL Analytics Exchange Client.
    2. In Server Address, enter the hostname of the server where your organization’s installation of AX Server is located. For example, ax.acl.com.

      The hostname you enter must match the hostname specified in the SSL security certificate to connect without encountering security certificate errors. If you do not know the hostname, ask your ACL Analytics Exchange administrator for this setting. You can alternatively enter the IP address for the server, but this is not recommended because you will encounter security certificate errors.

      Note

      If you do not know the hostname for the AX Server during installation, you can leave it blank. You will be prompted to specify the hostname the first time you start AX Client.

    3. Leave the Port number at the default value of 443, unless otherwise instructed by your Analytics Exchange administrator.
    4. Click Next.
  7. In the Import Certificates page, do any of the following and then click Next:

    Note

    Both self-signed certificates and CA-issued certificates ensure that the data transferred between AX Server and client applications cannot be easily accessed by a third party, however when you purchase a CA certificate you gain additional trust because an independent, trustworthy certificate authority validates the server's authenticity.

    If you do not know which certificates to use, contact your Analytics Exchange administrator.

  8. Click Install and when the setup wizard is complete, click Finish.

Connect to AX Server

  1. Start AX Client.
  2. If the Server page of the Options dialog box appears, enter the Server Address provided by your administrator and click OK.

    Use the server host name rather than the IP address:

    Note

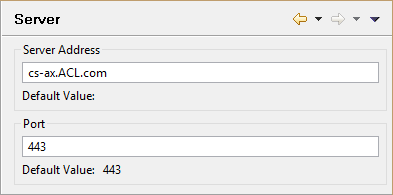
    The Options dialog box is only displayed if you did not enter the server address for AX Server during AX Client installation. In the dialog box, leave the Port number at the default value of 443 unless otherwise instructed.

  3. If you are required to enter your account information, the Connect view is displayed. Enter your Username and Password and click Sign in.
    User accountCredential format
    Default domain accountusername
    Non-default domain accountdomain\username
    Local Windows account where AX Server is installedcomputerName\username

    If you cannot connect to AX Server, or if there are error messages, ensure that you have entered the correct server address and port. If problems continue, contact your Analytics Exchange administrator.