Creating a robot task to run a script
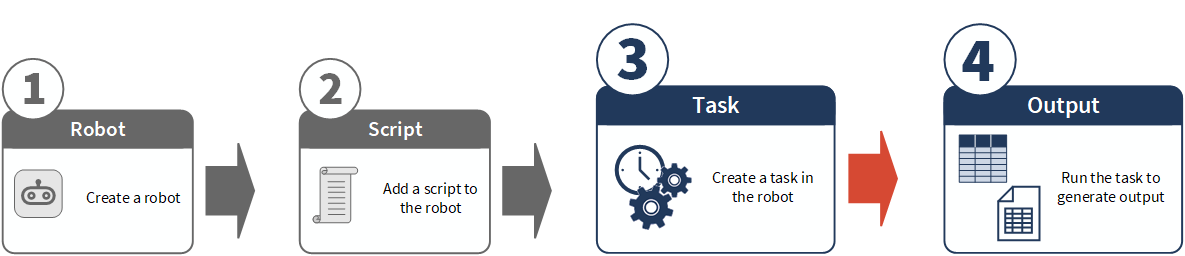
After you have created a robot and added script automation to the robot, you create and schedule a robot task to run the script automation. The task runs according to the settings that you configure. Each task has its own settings, independent from other tasks. In addition to scheduling a task, you can also run it ad hoc (manually).
For information about running multiple tasks in sequence, see Creating a task sequence to run multiple robot tasks.
Professional Edition limitations
The Professional Edition of ACL Robotics applies limitations to tasks, listed below. The Enterprise Edition of ACL Robotics does not have these limitations. For detailed information about editions of ACL Robotics, see Robots specifications and limits.
-
Number of tasks per robot: 5
The limit applies separately to development mode and production mode, so you can have a maximum of 10 tasks per robot across both modes (5 development + 5 production).
-
Number of robots with enabled tasks ("automated" robots): 1
The limit applies across both development mode and production mode – that is, 1 automated robot at a time in all of Robots. You are free to disable and enable tasks to change which robot is automated.
Note
Tasks can only run if they are enabled.
Create and schedule a task
Create and schedule a robot task in either development mode or production mode. Development and production tasks in the same robot are completely separate from each other with no functional association.
You create and schedule a task in the Task Designer.
Note
Workflow robots have tasks in production mode only.
Open a robot and create an empty task
-
From the Platform home page (www.diligentoneplatform.com), select the Robots app to open it.
If you are already in Diligent One, you can use the left-hand navigation menu to switch to the Robots app.
Note
Diligent One Platform also supports the domain www.highbond.com. For more information, see Supported domains.
- From the dashboard in Robots, select the tab for the appropriate robot type.
- Navigate to the robot that you want to contain the task, and select the robot to open it.
- In the upper-right corner of the robot, click Production or Development to select the mode for running the task.
For more information, see Development mode and production mode in Robots.
If necessary, activate a script version from development mode to production mode. For more information, see Activate a script version.
- On the Tasks tab, click Create task.
The Task Designer opens and you can begin configuring the task settings.
- Type a name for the task, and click Save.
Select the scripts that run in the task
- If you are creating a task in an ACL robot, do the following:
Under Deselected scripts, select the script or scripts that you want to include in the task.
To use all the scripts, select Select all.
The scripts that you select are moved into the Selected scripts list. Scripts are grouped by the TYPE that is specified in the ANALYTIC tag in a script's analytic header:
Import
Preparation
Analysis
Scripts with no specified TYPE are included in the Analysis group.
Only analytic scripts are available for selection. Auxiliary scripts are not available. To run, an auxiliary script must be called from an analytic script.
Optional. Within each script group, drag scripts to reorder them.
Within each group, scripts run in the order that you create, top to bottom. Place any dependent script below the script it depends on.
All the scripts in the Import group run before the scripts in the Preparation group, and so on.
- If you are creating a task in a HighBond robot or a Workflow robot, make sure the script is selected.
Currently, HighBond robots and Workflow robots support only a single script, which is selected by default.
Enter script parameter values and passwords
- For each selected script that requires parameter input, click the down arrow
 to expand the parameter section and enter the values for the script.
Note
The values that you enter for the parameters are unique to this task and are not shared across tasks.
If you are not the author of the script and you have questions about the parameters, contact the script author for more information.
- If you entered one or more passwords, click Share passwords if you want to allow other users to run, disable, or enable the task.
- Share passwords is on any user with access to the robot can run, disable, or enable the task
- Share passwords is off only you can run, disable, or enable the task
The Share passwords setting applies to all the scripts in a task. Regardless of the setting, other users can edit the task to enter their own passwords.
Whether shared or unshared, passwords remain masked in the Task Designer.
For more information, see Scripts with passwords.
- At the bottom of the page, click Continue.
Schedule the task
If you only want to run the task ad hoc, click Continue to skip this page. To run a task ad hoc, on the Tasks tab, select the task and click ![]() > Run now.
> Run now.
Note
The maximum number of ACL robot or HighBond robot tasks that can run simultaneously is 5. Tasks that exceed the maximum are queued.
- At the top of the page, select Put your task on a schedule.
- Specify the schedule details:
- Frequency the interval at which the task is repeatedly run
- Starting at the time of day to start running the task, and the time zone to use
Use your own time zone unless you want the start time to represent a different time zone.
- Beginning on the date to start running the task
- At the bottom of the page, click Continue.
Notify users if the task does not run
You have the option of sending an automated notification if the task does not run for any of the following reasons:
-
The script in the task failed to run successfully, resulting in a Failed status.
-
The task was skipped, resulting in a Skipped status.
-
The task was manually canceled, resulting in a Cancelled status.
If you do not want to send any notifications, click Continue to skip this page.
- Select Send notifications on failure to notify one or more specific users if the task does not run as scheduled.
- Click one or more users in the list to select them.
Only users with sufficient permissions for the robot are available to select.
Tip
Use the search bar to filter the names in the list.
- At the bottom of the page, click Continue.
Review the settings and finalize the task
- Review the settings that you have configured for the task.
- Optional. To update a setting, click
 and make the required changes.
 - When you are satisfied with the task configuration settings, click Confirm and create task.
Result The task is created using the settings that you specified. If you scheduled the task, it starts running at the first scheduled occurrence.
Note
(Professional Edition only)
If the task is flagged as Disabled, another robot already contains enabled tasks. Tasks can be enabled in only one robot at a time.
If the other robot is owned by someone else, and you are not a collaborator, you are not able to see the other robot.
Copy a task
To save time and effort, copy a task from development mode to production mode. You can also copy a task within development mode, or within production mode. Copying a task from production mode to development mode, or between two robots, is not supported.
When you copy a task, some task configurations are copied and some are not.
| Task configuration | Copied |
|---|---|
| Script selection |
|
| Script input parameter values |
|
| Task schedule |
|
| User notifications |
|
Note
Copying a task from development mode to production mode requires that an activated script version already exists in production mode. If necessary, activate a script version before proceeding. For more information, see Activate a script version.
You cannot copy a task with an unshared password that is not your own. For more information, see Scripts with passwords.
To copy a task
-
From the Platform home page (www.diligentoneplatform.com), select the Robots app to open it.
If you are already in Diligent One, you can use the left-hand navigation menu to switch to the Robots app.
Note
Diligent One Platform also supports the domain www.highbond.com. For more information, see Supported domains.
- From the dashboard in Robots, select the tab for the appropriate robot type.
- Click the robot with the task that you want to copy.
- In the upper-right corner of the robot, click Production or Development to select the appropriate mode.
For more information, see Development mode and production mode in Robots.
- On the Tasks tab, select the task that you want to copy and click
 .
. - Select one of the following:
- Copy here
- Copy to Prod (available in development mode)
The task is copied within development mode, within production mode, or from development mode to production mode. The suffix -copy is appended to the name of the copied task.
- Edit the task to update the task name, add a schedule, or add a user notification.
For more information, see Maintaining a robot task.
Restrictions
Two situations prevent a task from running, whether it is scheduled or run ad-hoc:
- Disabled task
- Unshared password
As well, a task sequence fails if it contains a disabled task, or a task with an unshared password and the sequence is run by someone other than the password owner.
Disabled task
A disable task is prevented from running. To enable a task, select the task and click ![]() > Enable. For more information, see Maintaining a robot task.
> Enable. For more information, see Maintaining a robot task.
Note
The Professional Edition of ACL Robotics allows only one robot at a time to contain enabled tasks. Keep in mind that a robot with an enabled task may not be visible to you because you are not a collaborator.
Unshared password
If a task contains a password entered by another user, and the Share passwords setting is off, you cannot enable or run the task. For more information, see Scripts with passwords.
You can edit the task to enter your own password, or create a new task.
Run a task ad hoc
Run a task in Robots ad hoc to start the task immediately, regardless of schedule. Once the task completes, you can view the results.
Tip
(ACL robot with an on-premise Robots Agent only)
If tasks are remaining queued for a long time in Robots, and then failing, check that the Robots Agent service is running on the server where the Robots Agent is installed. Start the service if it is stopped.
Steps
-
From the Platform home page (www.diligentoneplatform.com), select the Robots app to open it.
If you are already in Diligent One, you can use the left-hand navigation menu to switch to the Robots app.
Note
Diligent One Platform also supports the domain www.highbond.com. For more information, see Supported domains.
- From the dashboard in Robots, select the tab for the appropriate robot type.
- Navigate to the robot that contains the task you want to run, and select the robot to open it.
-
In the upper-right corner of the robot, click Production or Development to select the mode to use.
For more information, see Development mode and production mode in Robots.
- On the Tasks tab, select the task that you want to run and click > Run now.
Result the task starts and you can monitor its progress and view results in either the Tasks tab or the Task runs tab.